Mosaic Tile Installation Tutorial: Complete Guide from Preparation to Completion
[Image: Mosaic Installation Construction]
Proper installation of mosaic tiles directly affects the final effect and service life. This tutorial will detail the complete process from preparation to completion acceptance, helping you or your construction team perfectly present the beauty of mosaic.
Pre-Installation Preparation
Tool List
[Image: Mosaic Installation Tools]
Essential tools:
Tool | Purpose
|——|———|
Tile Cutter/Mosaic Nippers | Cutting edges
Notched Trowel | Applying adhesive
Rubber Mallet | Tapping to fix
Spirit Level | Checking flatness
Laser Level | Positioning reference line
Grout Gun | Grouting work
Sponge/Cloth | Cleaning surface
Mixer | Mixing adhesive
Bucket | Holding materials
Material Preparation
Substrate Preparation
[Image: Substrate Preparation Check]
Wall Requirements:
1. Flatness: 2m straightedge check, error ≤3mm
2. Verticality: ≤2mm
3. Corner squareness: ≤2mm
4. Substrate strength: No hollows, cracks
5. Moisture content: <8%
Treatment Steps:
1. Remove surface oil, dust
2. Repair cracks, holes
3. Apply interface agent (concrete walls)
4. Leveling treatment (if needed)
5. Dry for more than 24 hours
Detailed Installation Steps
Step 1: Layout and Positioning
[Image: Mosaic Layout Positioning]
1. Measure wall/floor dimensions
2. Calculate mosaic quantity and position
3. Determine starting point (usually from center)
4. Mark control lines with chalk line
5. Dry lay test, adjust position
**Tip:** Try to avoid edges with less than half pieces, can be solved by adjusting spacing.
Step 2: Apply Adhesive
[Image: Apply Adhesive]
1. Mix adhesive according to instructions
2. Rest for 5 minutes, stir again
3. Use notched trowel to apply evenly
4. Notch direction consistent (single direction)
5. Thickness control at 3-6mm
Notched Trowel Specifications:
Mosaic Size | Trowel Specification
|————-|———————|
10-15mm | 4×4mm notches
20-25mm | 6×6mm notches
30mm+ | 8×8mm notches
Step 3: Install Mosaic
[Image: Install Mosaic]
1. Complete installation before adhesive skins (usually within 10-15 minutes)
2. Place mosaic sheet according to control lines
3. Tap flat with rubber mallet to ensure level
4. Check alignment between sheets
5. Remove excess adhesive from mosaic gaps
Notes:
Step 4: Edge Treatment
[Image: Mosaic Edge Cutting]
1. Measure remaining edge space
2. Cut with mosaic nippers or cutter
3. Safety first, wear safety glasses
4. Place cut pieces in position
5. Check overall effect
Step 5: Curing
Resting Time:
Avoid touching, vibration during this period.
Step 6: Grouting
[Image: Mosaic Grouting]
1. Check if adhesive is fully cured
2. Clean debris from gaps
3. Mix grout according to instructions
4. Use rubber float or grout gun to apply
5. Apply diagonally to ensure full gaps
6. Wait 10-20 minutes (according to product instructions)
Grout Selection:
Type | Characteristics | Application
|——|—————–|————-|
Cement-based Grout | Economical | Dry areas
Polymer-modified Grout | Better waterproof | Bathroom areas
Epoxy Grout | Highest strength, waterproof | Pools, kitchens
Step 7: Cleaning and Finishing
[Image: Clean Mosaic Surface]
1. Start cleaning after grout initial set (10-20 minutes)
2. Use damp sponge, wipe diagonally
3. Clean sponge frequently, keep clean
4. Avoid wiping grout out of gaps
5. If residue remains after drying, use acidic cleaner
Step 8: Final Curing
Special Area Installation Points
Pool Installation
[Image: Pool Mosaic Installation]
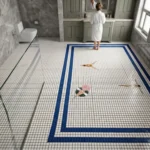
Shower Area Installation
Outdoor Installation
Common Problems and Solutions
Problem | Cause | Solution
|———|——-|———-|
Hollow Sound | Insufficient or uneven adhesive | Remove and re-tile
Color Difference | Mixed different batches | Purchase same batch
Poor Flatness | Uneven substrate | Level substrate
Incomplete Grout | Improper operation | Re-grout
Mold | Improper grout | Use anti-mold grout
Acceptance Standards
[Image: Mosaic Acceptance]
Need Help?
If you have engineering projects requiring technical support, we provide:
Contact Information:
—
Detailed mosaic installation tutorial, including tool preparation, substrate treatment, adhesion steps, grouting tips, and acceptance standards. Professional guidance to help you complete perfect mosaic projects, Foshan factory provides technical support.